In the past year, we went through major decluttering projects in our home, including a very messy garage, a bedroom closet, and a books & games walk-in closet. We found it helpful to review other people’s “before and after” images to get some inspiration for our own projects, so I’m sharing here our own images as well as some other really great examples of before and after transformations.
If you are anything like me, just looking at these awesome before and after decluttering images will inspire you to improve your own home and give you the motivation to get started. You will also be able to find plenty of ideas to replicate to organize your own space.
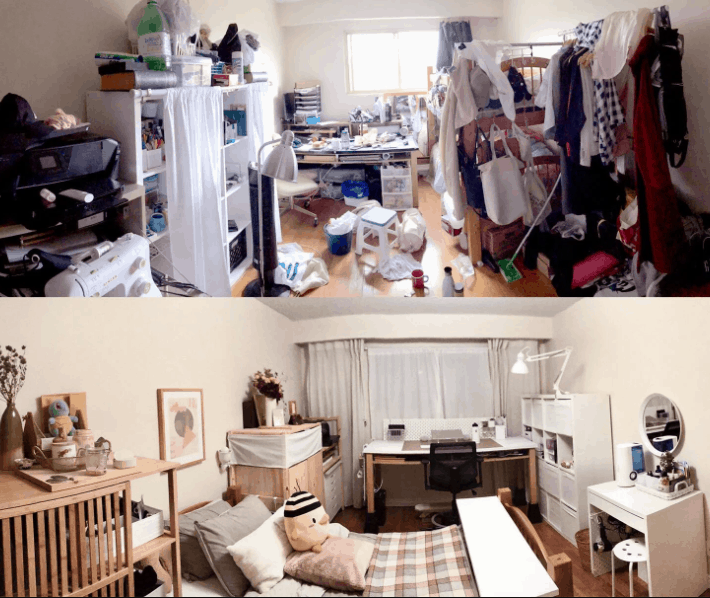
1. Bedroom Examples: Declutter Before & After Images
We found that this was an excellent example of re-organizing a bedroom with cute furniture to be able to keep everything tidy. Adding small touches like curtains and frames on the wall certainly helps.
BEFORE and AFTER images:
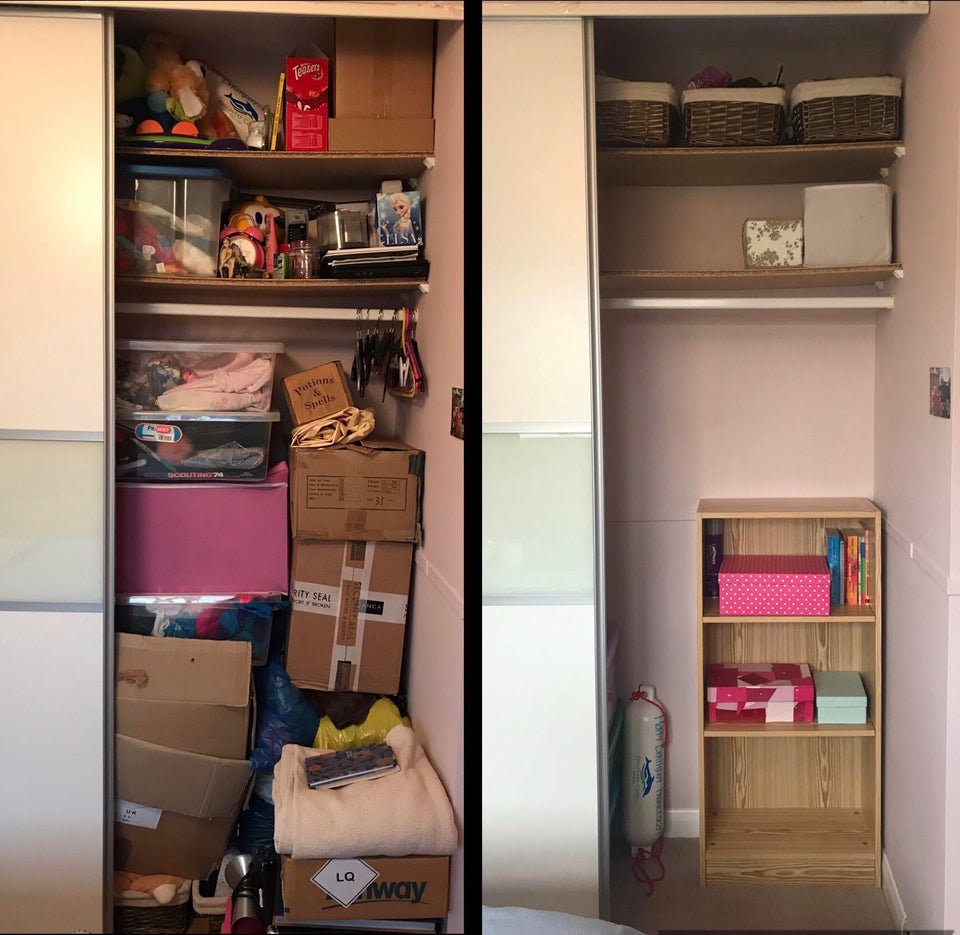
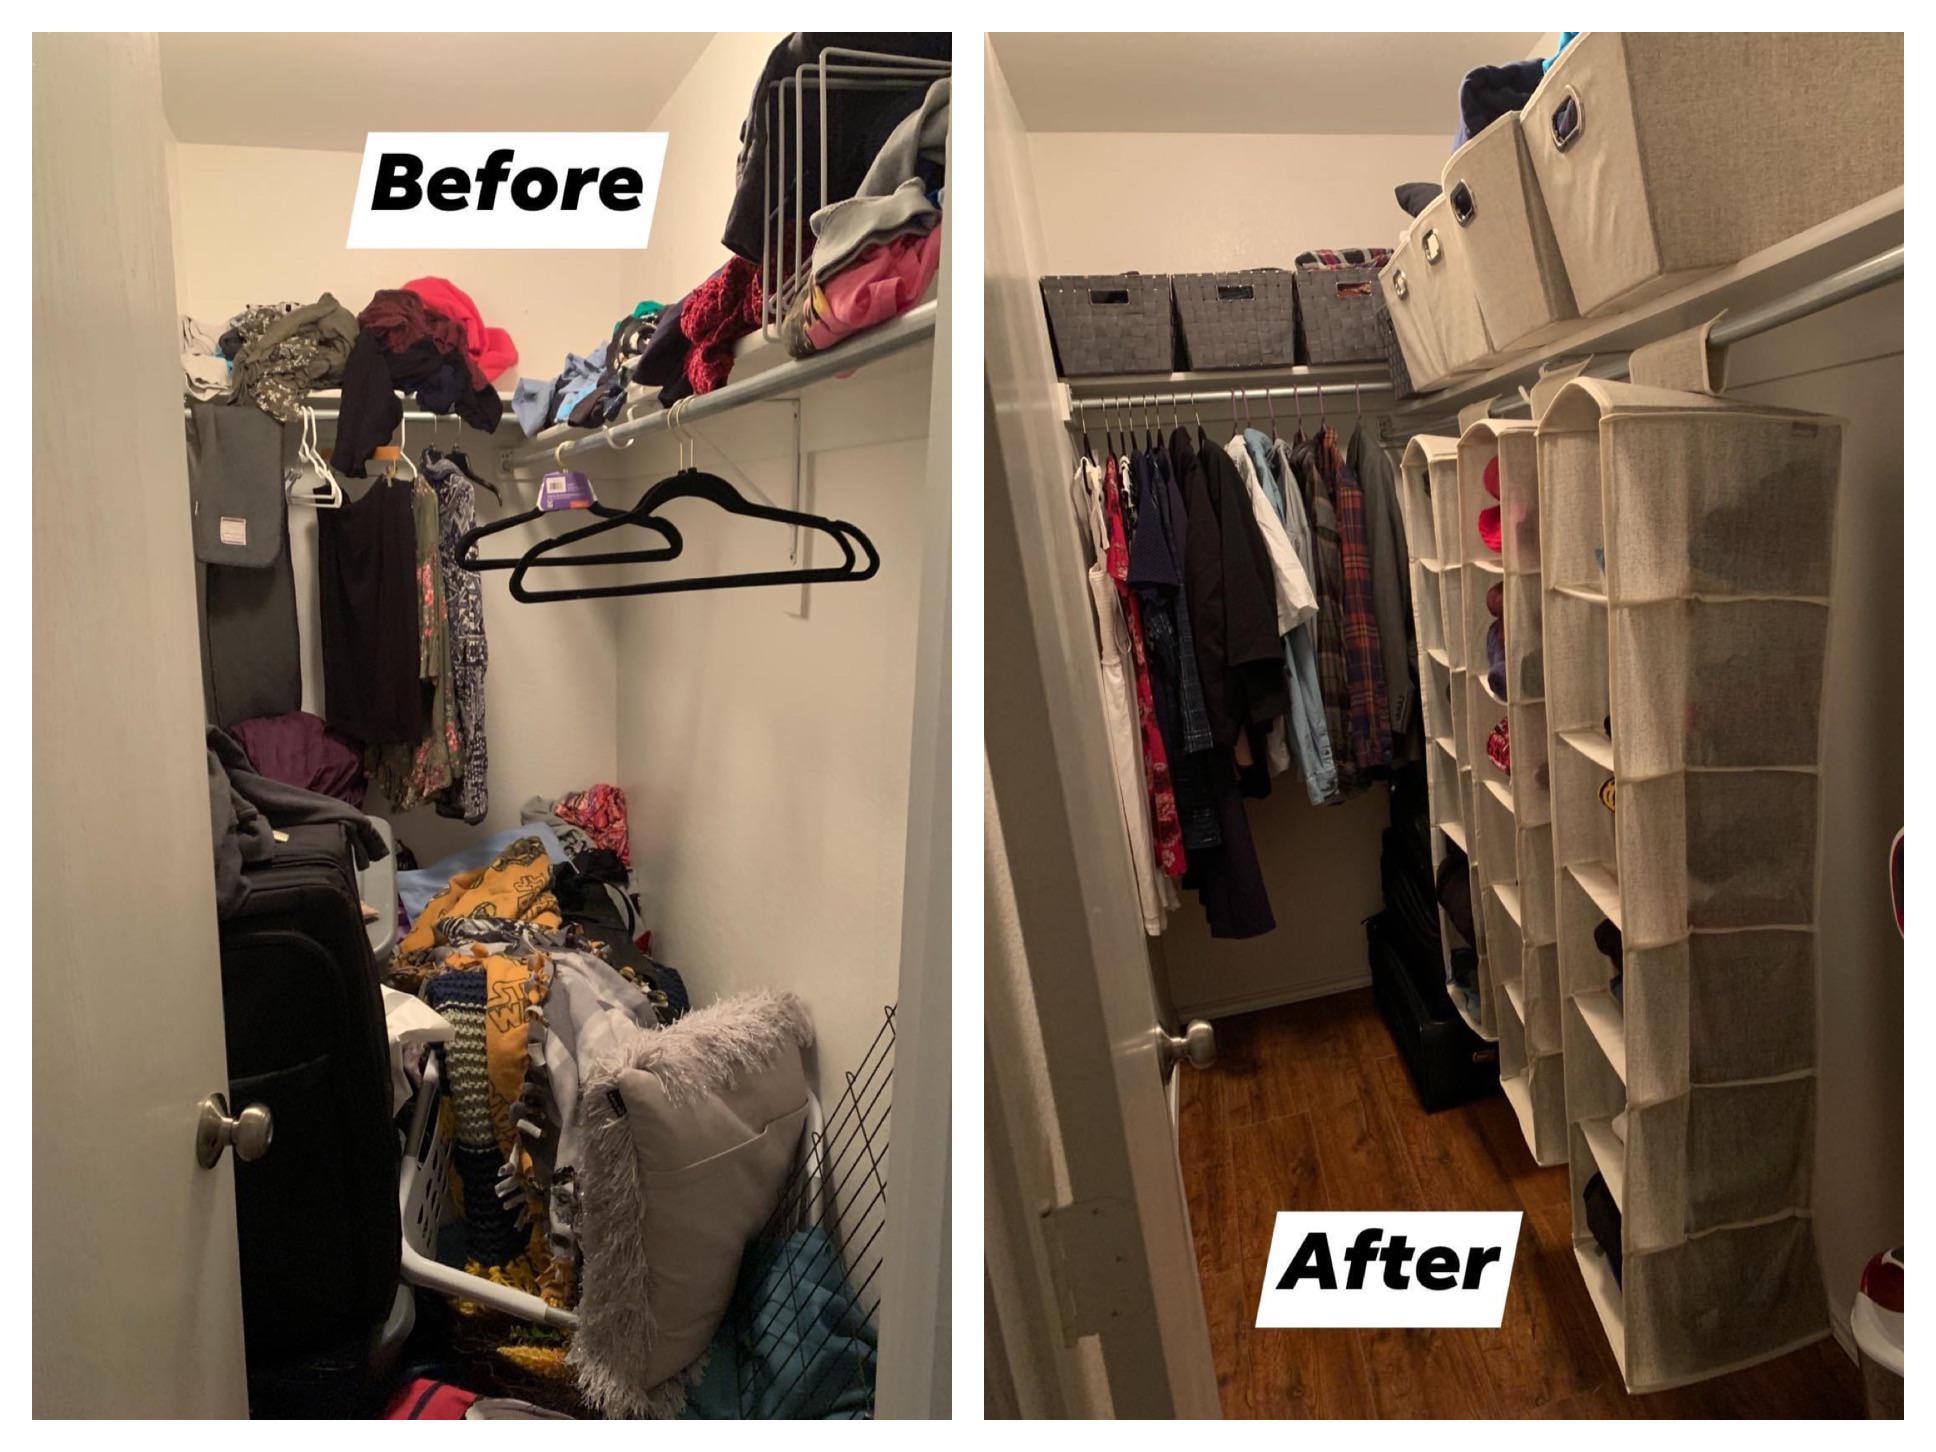
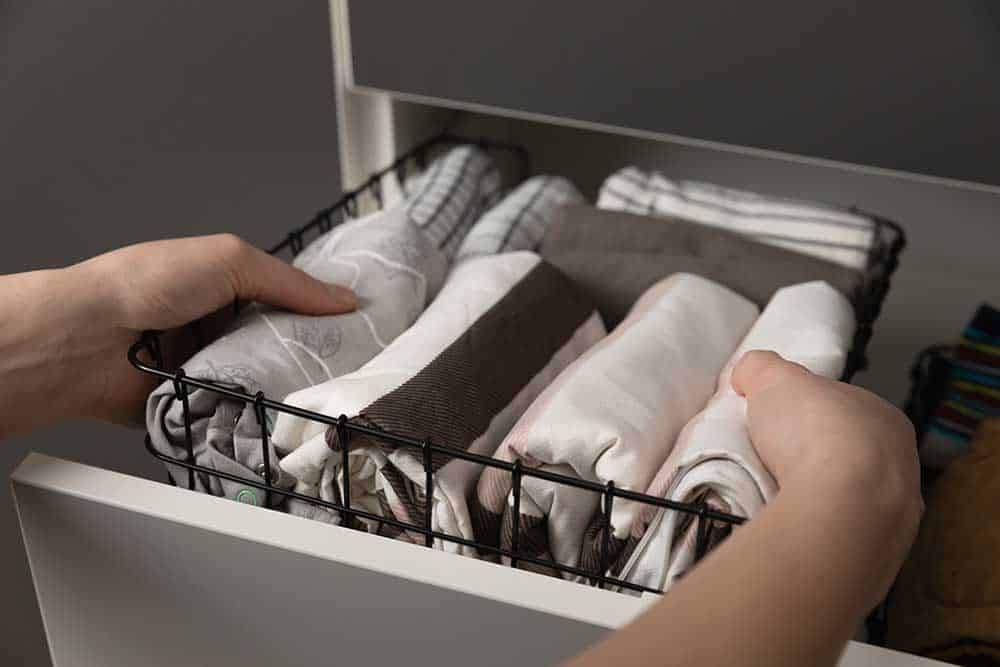
2. Bedroom Closets: Declutter Before & After Images
BEFORE & AFTER Images:

You can use simple leaf baskets such as these to organize your closets:
Before and after image of a closet, organized after 1) discarding items, 2) organizing what is left with storage baskets and shelves.
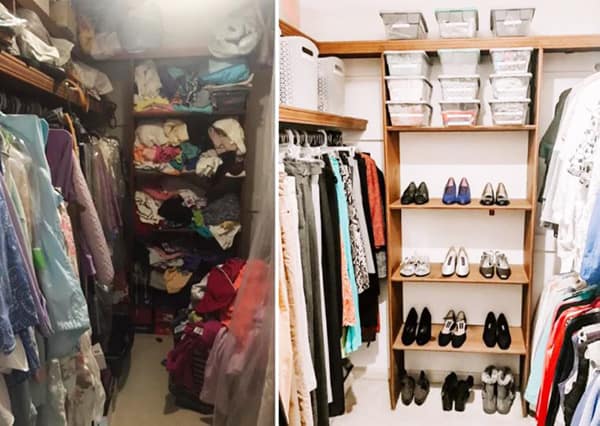
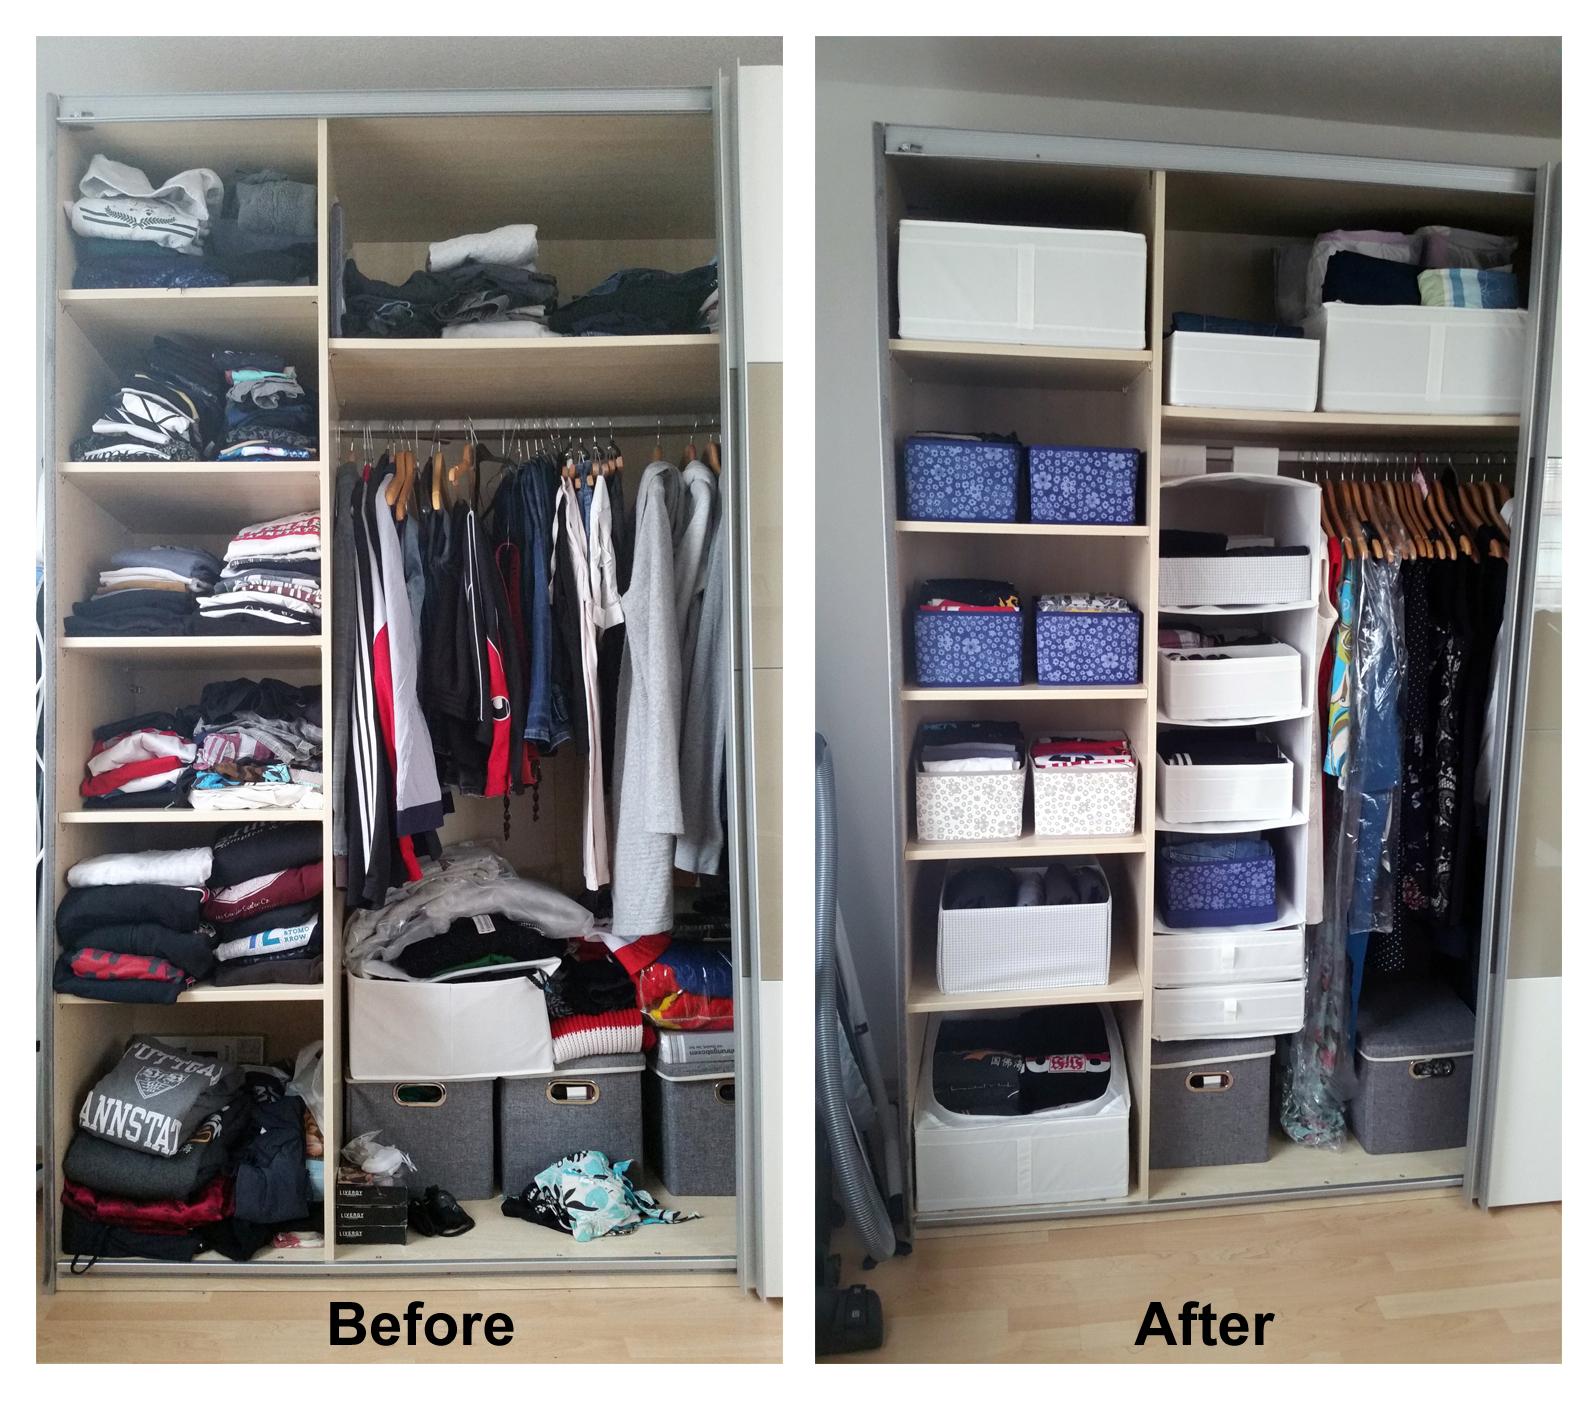
3. Declutter Your Clothes: Before & After Images
Here is another example that shows how recycling/donating a portion of your clothes and using simple storage boxes to help organize the rest can make a huge difference. Impressive, isn’t it?? Of course, improved lightning with better bulbs can help…
BEFORE and AFTER images:
It’s amazing what a few storage boxes, hanging organizers (and 11 trash bags for donation) can do to improve the organization of clothes in a bedroom closet:
My wife also recently went helped a friend re-organized her closet. While we did not pay for any additional storage system for the garage, the friend decided to invest in a custom closet solution.
BEFORE image
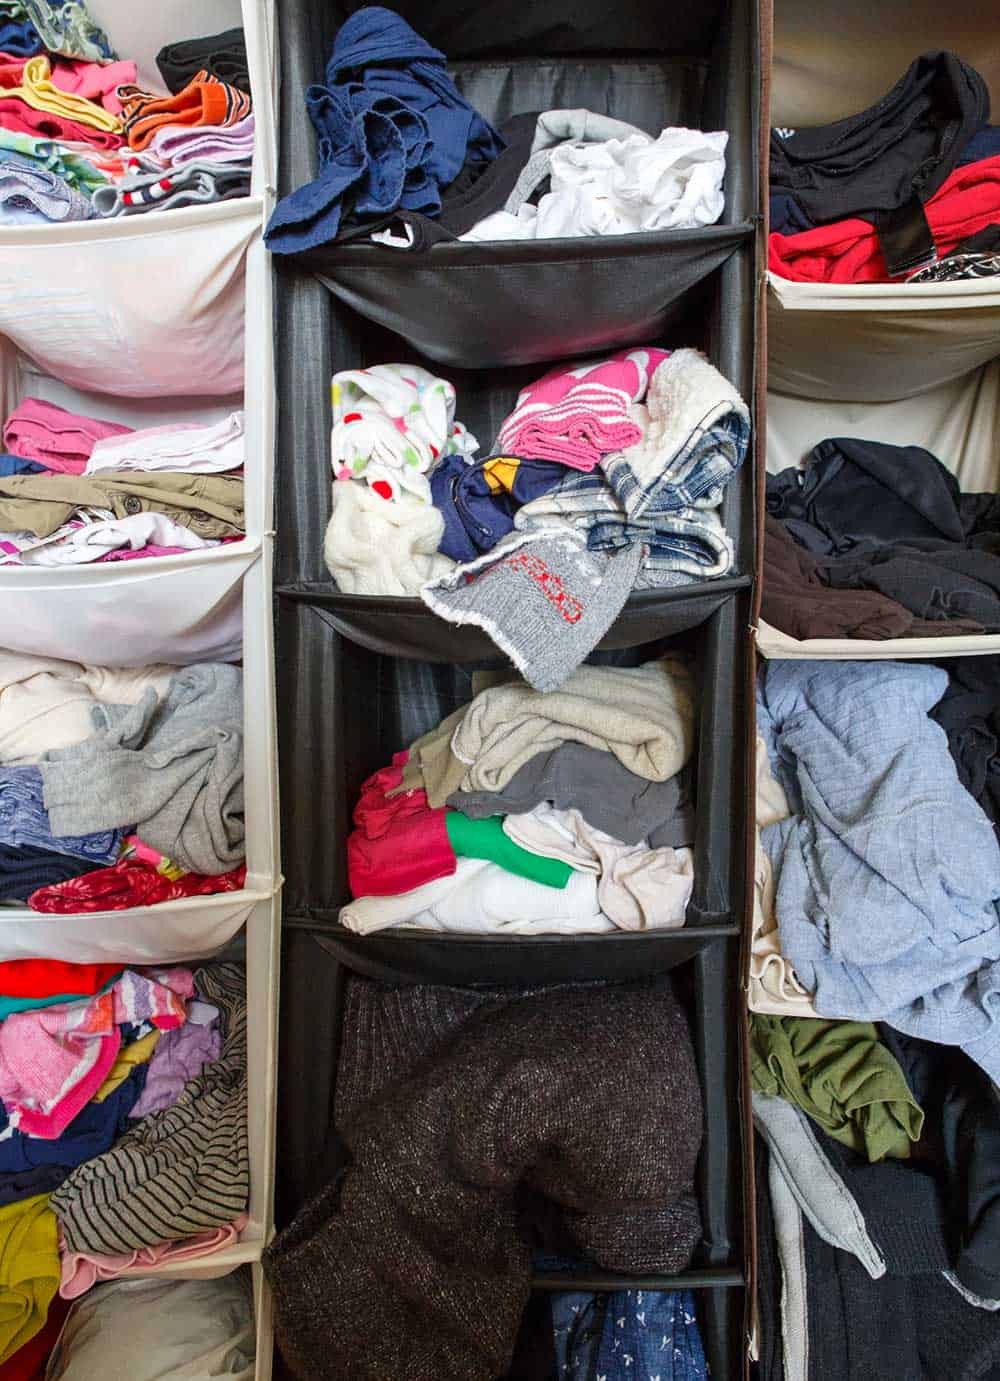
The bedroom closet used cheap Ikea hangers to store a bunch of clothes all jumbled up together. Ouch!
AFTER image
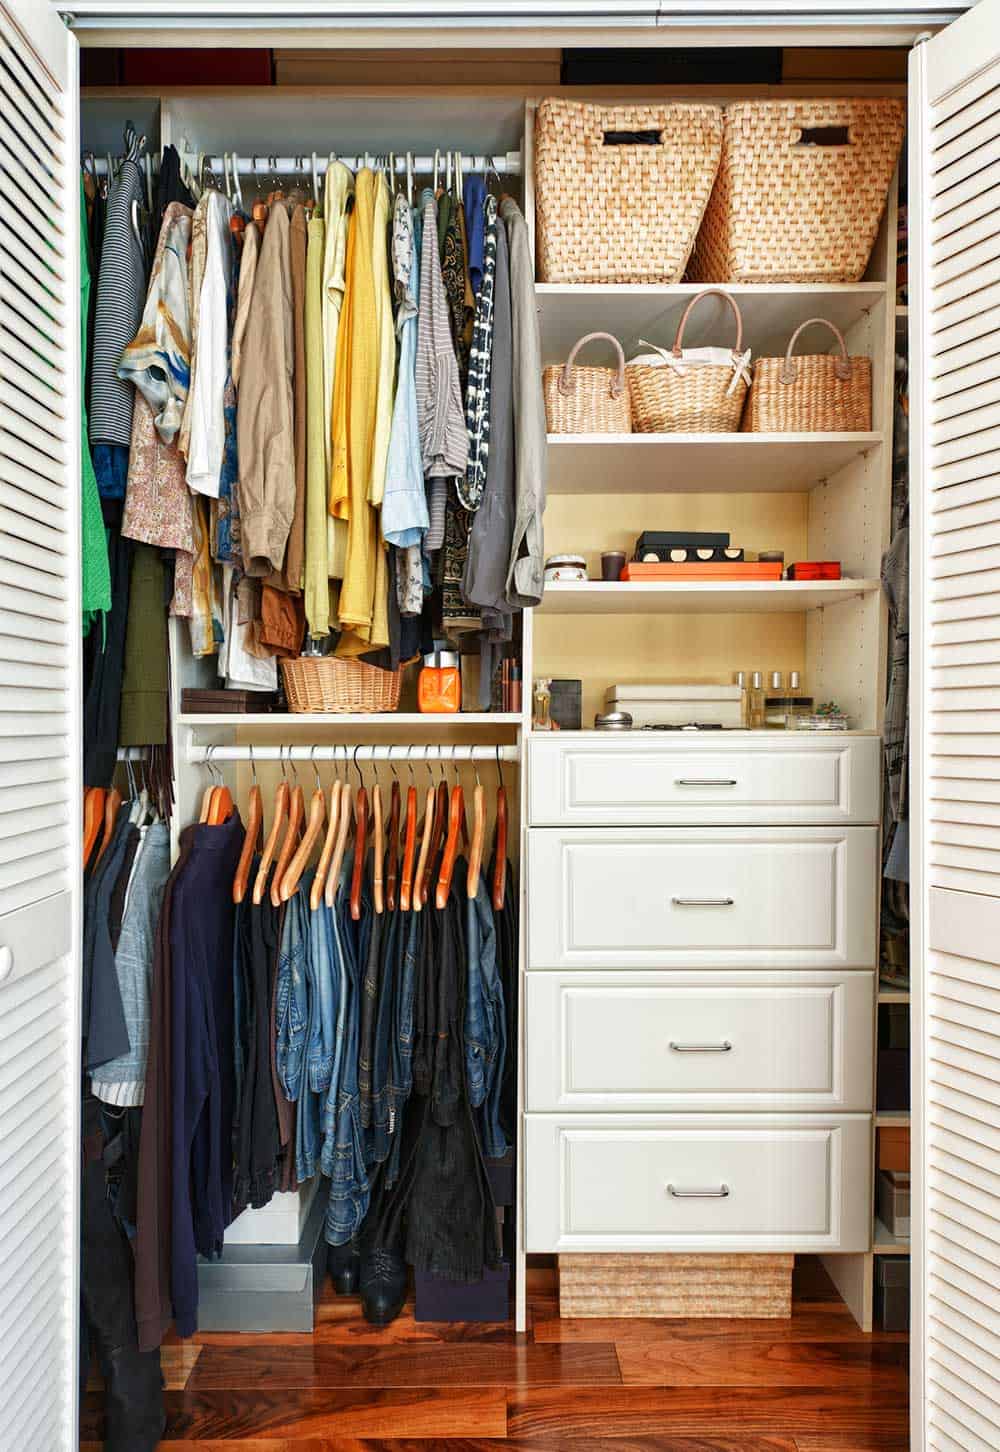
And here is the same closet with new shelves and storage organization. You also also read our articles on how to declutter clothes to learn more about the lessons we learned in the process.
As mentioned, we found it helpful to review other people’s before and after images for inspiration for our own projects. We found this picture shared on Reddit by a user account that has unfortunately now been deleted.
Congratulations to nat_caho who shared this amazing post on Instagram (no wonder it received more than 1,000 likes!).
Click on the image slider to view the before/after image.
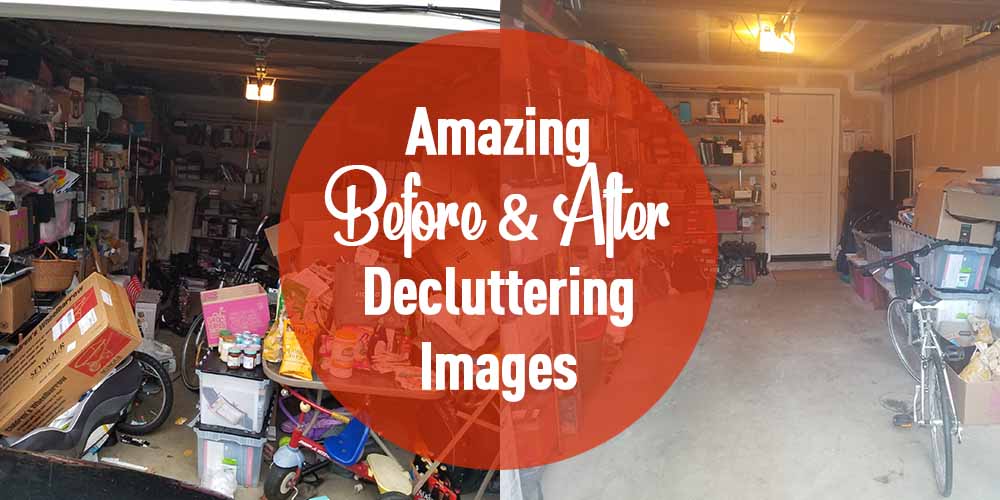
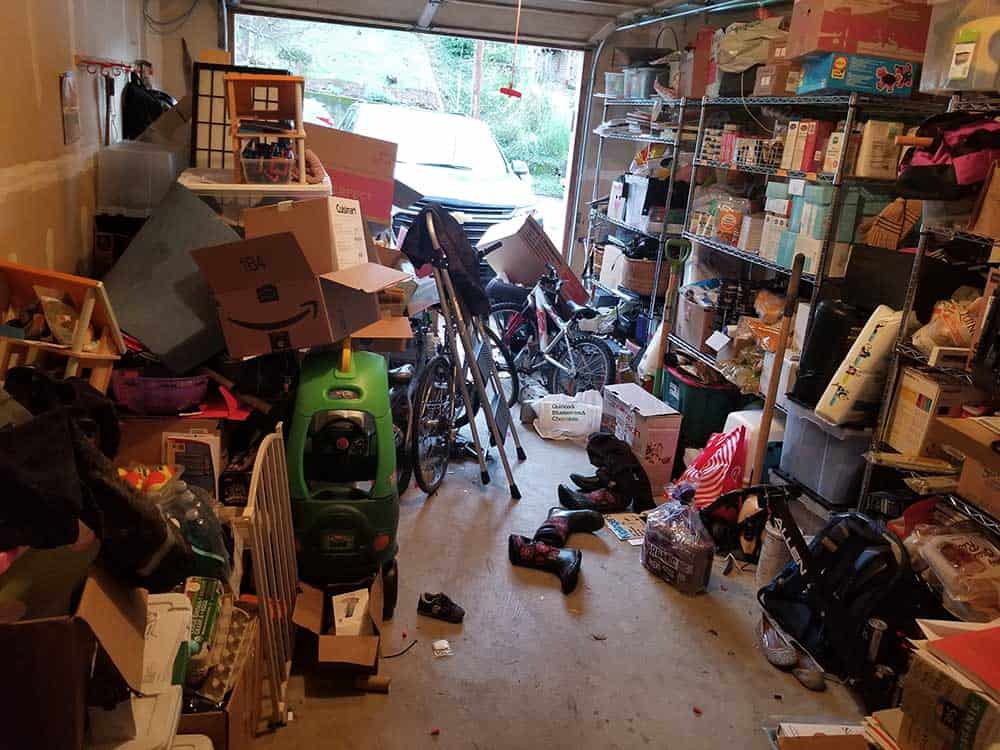
2. Garage Example: Declutter Before & After Images
We’ve recently managed to declutter our garage, and spent about 12-15 hours on this big projet. I was first hesitant to share images online of our own personal mess. This was nothing to be proud of! However, I take comfort in the fact that most people have an enormous mess in their garage. In fact, 25% of Americans say that there is too much mess in their garage to fit a car (See Reuters article).
BEFORE Image (1 of 2)
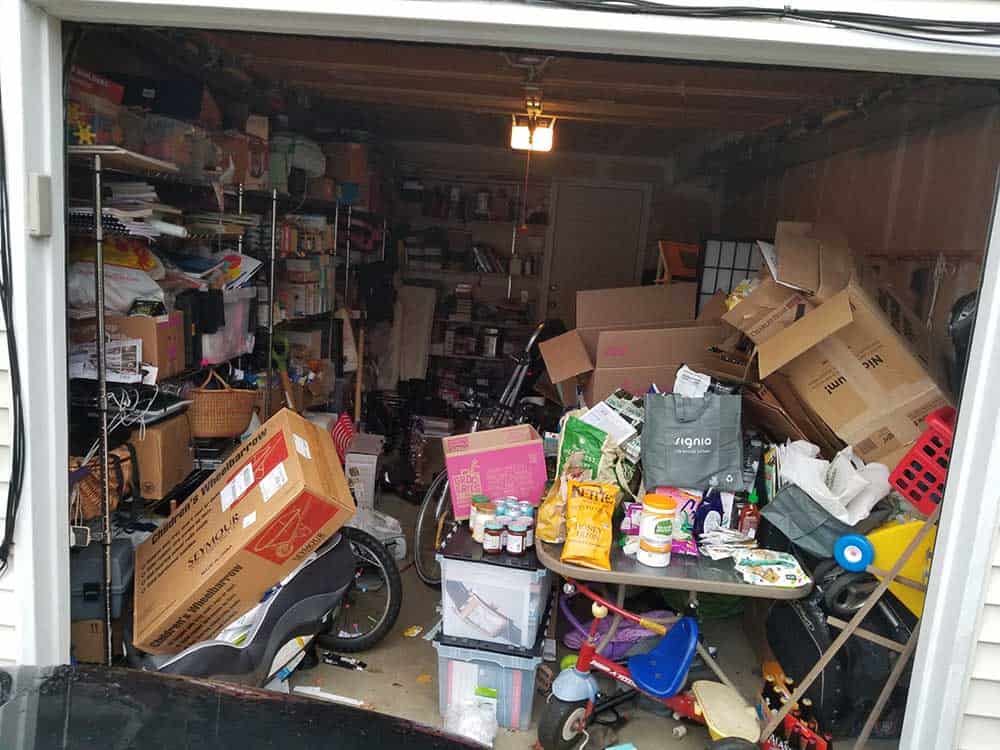
Somehow, we had so much clutter that we could not even walk through the room. Having three young children in the past few years certainly did not help, as we accumulated plenty of children’s clothing, toys and arts and crafts activities, as well as extra food for the now (very) large family!
BEFORE Image (2 of 2)
AFTER Image (1 of 2)
Below you will find “after” images after the decluttering effort. Overall, I took us about 12 to 15 hours of work to get there. I have to stress that our goal was not to showcase an HGTV like project, with an amazing room at the end. We simply wanted to get rid of the clutter, and be able to organize products better. We also did not want to purchase additional storage solutions. So here are two “after” images:
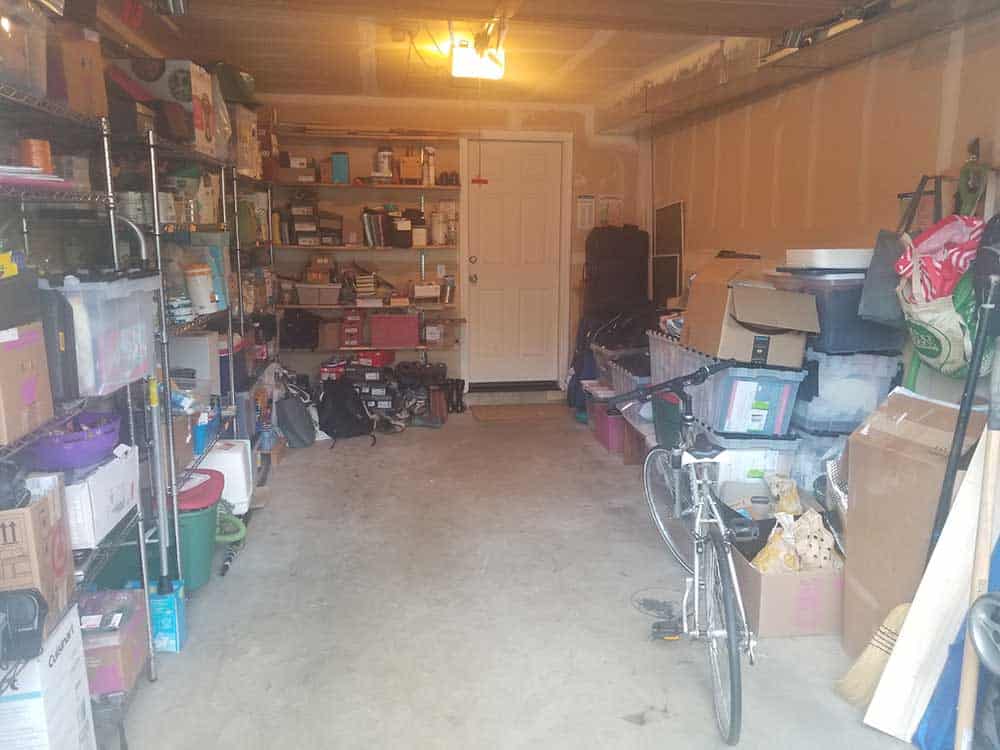
AFTER image (2 of 2)
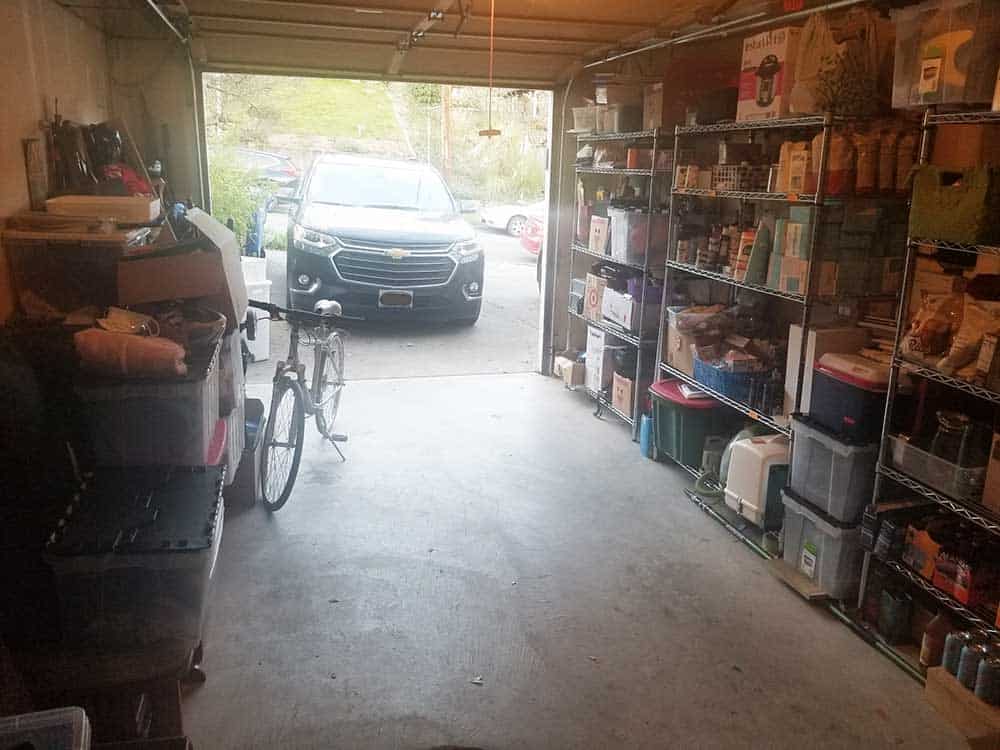
You can click here to learn more about this project and view our top tips for decluttering a garage.
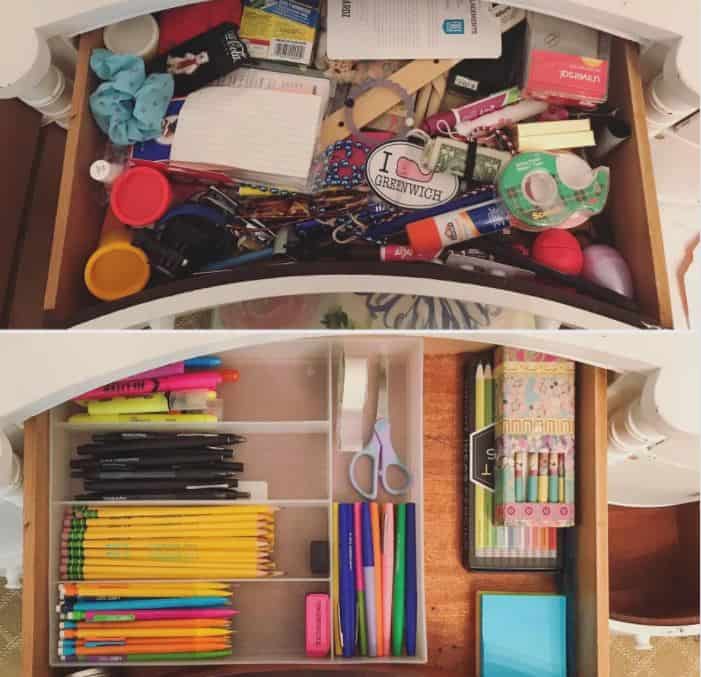
4. Drawers: Before & After Images
Drawers can be a major source of mess as well. Are you familiar with this kind of drawers? You can find inexpensive organisers to quickly organize your drawer mess.
Before & After Image:
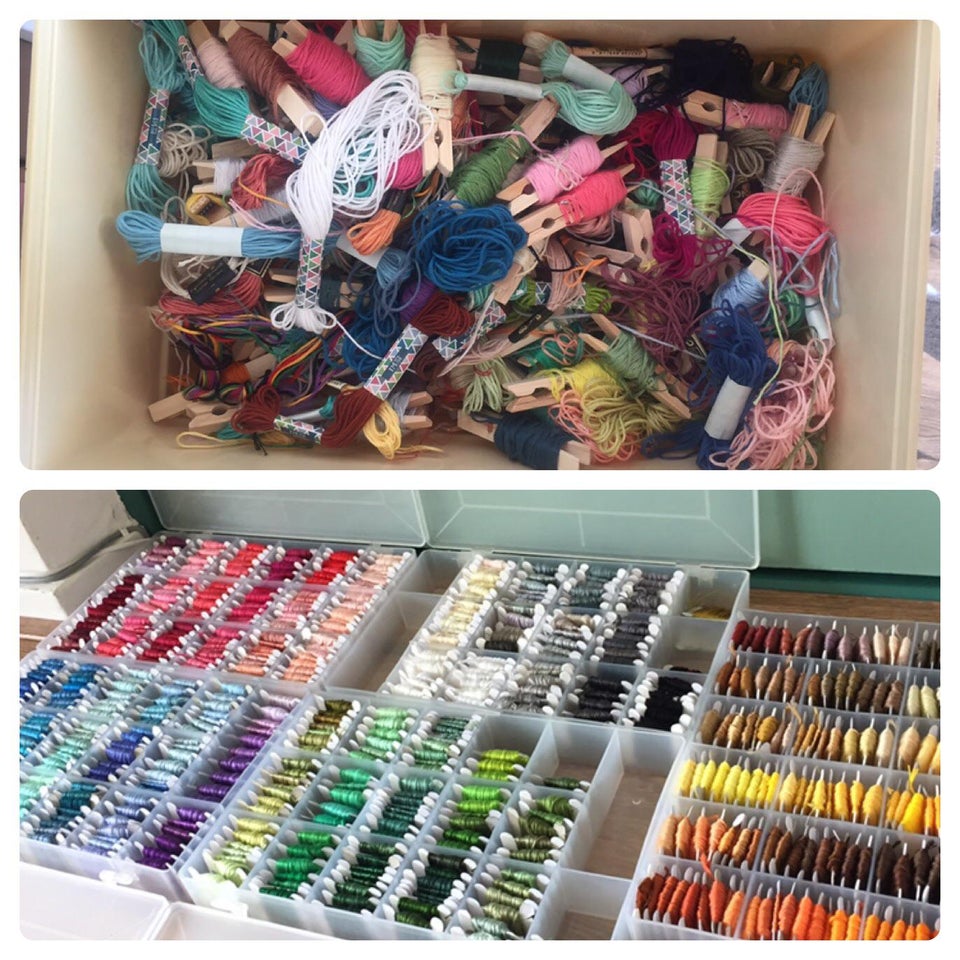
Here is another fantastic example:
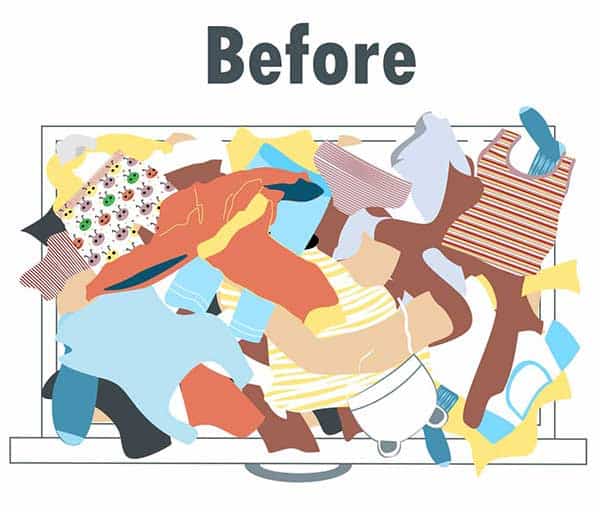
So how can you go from a messy to an organized drawer? The idea is to use Drawer Dividers to organize the content into different section. This illustration below provides a good example.
With drawer dividers, you can go from this:
To this:
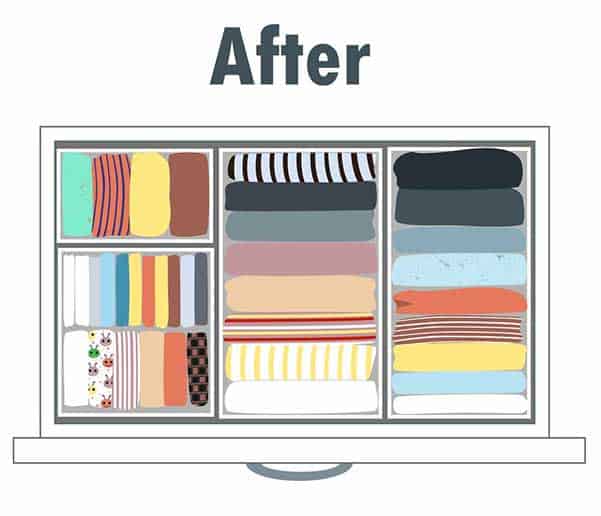
So how do you organize a drawer to look like the “After” example above? Here are nice examples of elegant storage dividers that you can insert in a larger chest of drawers to help organize your clothes and avoid clutter:
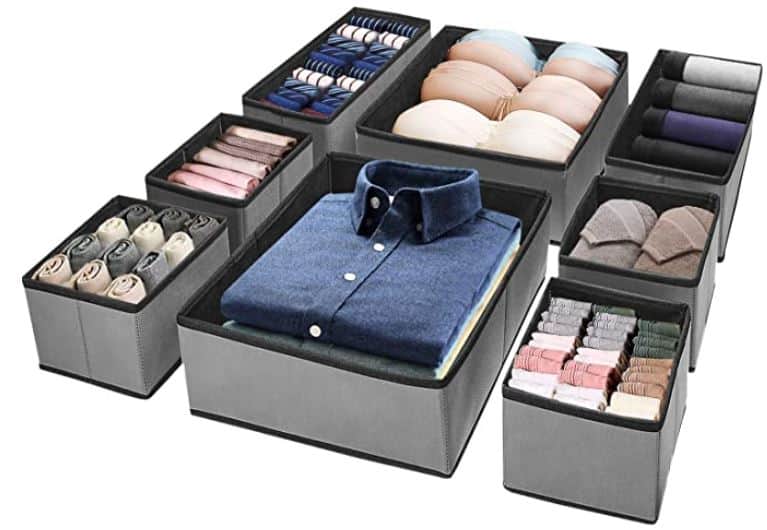
See more options on Amazon:
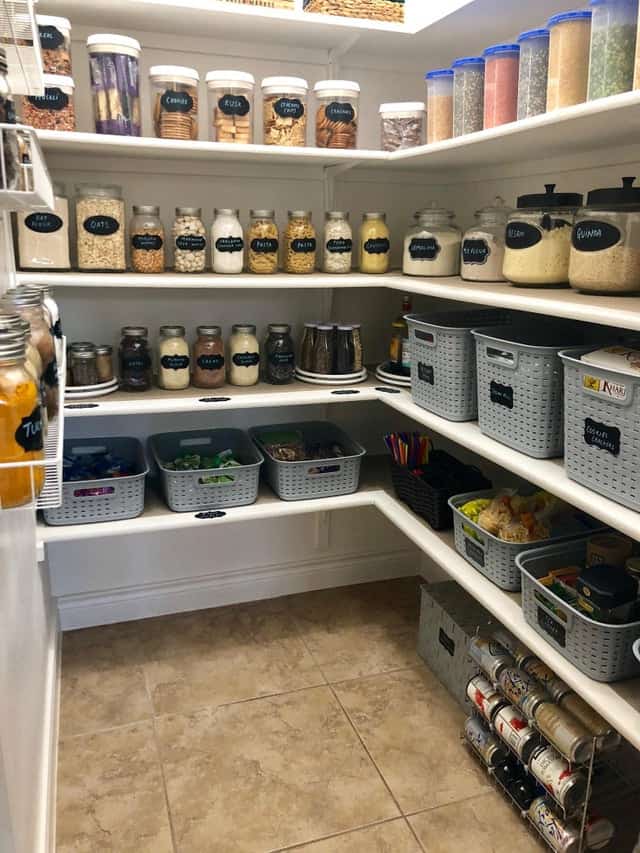
5. Your Pantry
A great example of an organized pantry:
6. Inspiring BEFORE & AFTER Decluttering Videos
If you are interested in advanced before and after decluttering projects, Check out these videos:
And this is a fun “Extreme” declutter video that shows great before and after situations.
And this bedroom decluttering video is a bit long but also feature great before and after images:
7. My Top 3 Tips to Tackle a Large Decluttering Project
As mentioned, we recently decluttered our garage, and it was not an easy project. We had a lot of mess to deal with. We tried several times to do it in the past, and failed every time!
This time, we read several articles on decluttering to help us learn how to best tackle a project like this. So what have we learned from this big project? Here are my top 3 tips:
1. Discard First, Before Re-Organizing
As you start a new decluttering project, it is tempting to do everything at once: you can discard products, reorganize items that are misplaced, create new storage solutions and come up with new organization methods. However, in my mind, it is the best way to fail fast and get discouraged. I believe it is the reason we failed in the past to declutter this room: we simply tried to do everything at once, saw very little results after a few hours, and gave up because it simply didn’t seem to be worth the effort.
After reading up on advice from decluttering experts, we decided to focus our first few hours exclusively on throwing away products to free up space. Before the start of our project, we prepared five boxes and labelled them: 1) sell, 2) trash, 3) recycle, 4) donate, and 5) re-organize. You can see on the image below the 5 boxes (including the recycle bin) that we prepared before we got started. Getting these boxes ready ahead of time saved us a lot of time and allowed us to discard products very quickly.
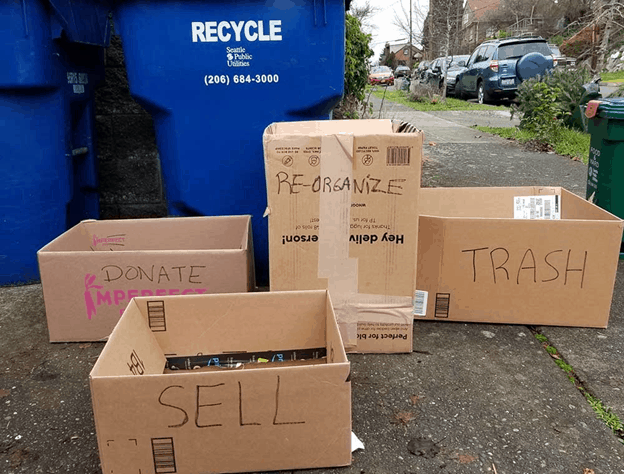
Each box will give you an easy way to make your decisions to discard products: you can either trash them, recycle them, sell them online, or donate them to Goodwill or other charities.
As you fill up these boxes, you will be able to free up a lot of space really quickly. You will see very visible results in your first couple of hours of work, and this will help keep you motivated. I can’t stress enough how important it is that you see the results of your work quickly, as it will keep you motivated and excited about the project.
So why is there a reorganized box? If you’re tackling a large de-clutter project, you will likely come across many items that are in the wrong spot, and need to be re-organized somewhere else. It is very tempting to try to reorganize everything as you come across new items. However it means you will invest a ton of time into simply moving items from one place to the other. Instead, focus your time exclusively on discarding first to help free up as much space as possible. It will help with your reorganization efforts later. It paid off quickly for us: within a couple of hours, we could see the impact of our work as new areas of the garage became clutter-free. So we kept going!
2. Get Ready to Get Products Out Of Your House.
I read the advice on this page before starting to declutter, but should have paid closer attention. Getting so many items out of our house proved more challenging than I initially thought. Why? We ended up:
- Using our regular trash bins
- Using our neighbors’ trash bins (With their permissions, of course)
- Dropping items at Goodwill
- Selling on Offer Up and Craiglist
- Reaching out out to neighbors and people with young children (we had a lot of children items)
- Dropping off clothes in a clothes disposal box near us (see google search for your local results)
- Dropping off toxic products at a local facility. Here is an example from the Earth911 website: How to Recycle Paint | Earth911
- We even ended up sawing wooden gates to discard.
To learn more about the different strategies you can use to get items out of the house, check out: 10 Ways to Get Rid of Stuff Once You’ve Decluttered
3. Once you are Done Discarding, Think about Re-Organization Products
When you have a large clutter, it is important NOT to reorganize your clutter into boxes and shelves. Having a nice, organized clutter is not the goal. Instead, it is very important that you focus on getting items that you no longer use/need out of your house, and only reorganize items that you should ready keep. But you need to make the tough decisions first, and figure out what you should really keep.
Once you are done discarding, think about getting organization products to help you organize the products you do want to keep. We personally already had 3 high-quality storage selving systems from Lowe’s (see below). These shelves are super solid and helped us store holiday decor, food/drinks and children items. They are not that expensive at about $60 to $120 per unit.You can find them at any home improvement store or on Amazon.

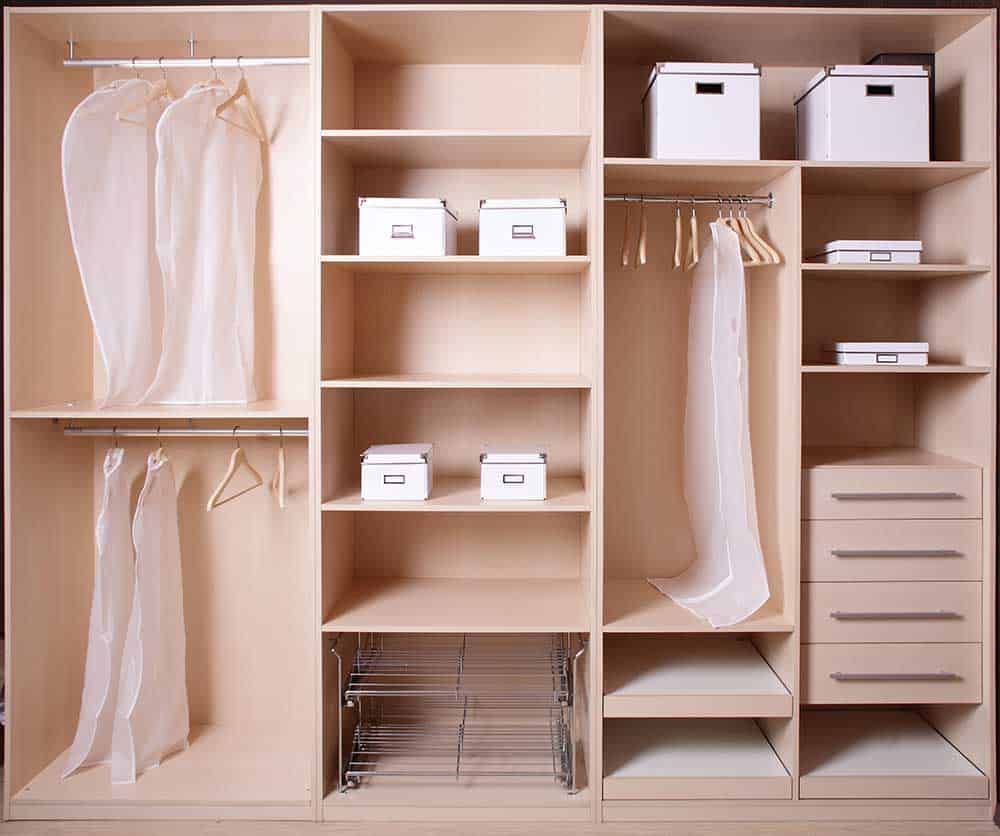
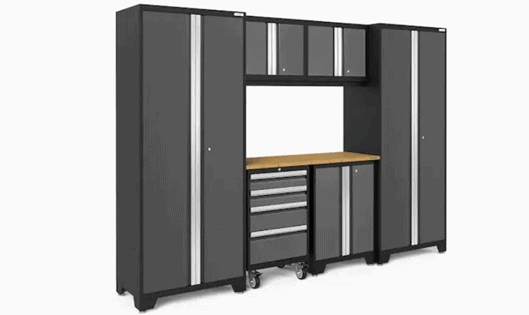
Of course, If you have a bigger budget, and really want to professionally organize your space, they are more advanced storage solutions that work great. For example, this works great for a bedroom:
and this work great for a garage:
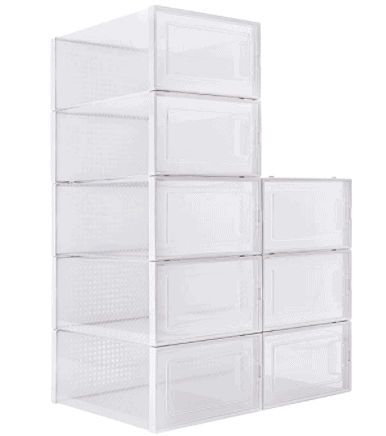
Stackable storage boxes also work great if you are looking for a cheap solution. Simply stack the boxes on top of each other. We used about 10 to 12 of these boxes for holiday decor, shoes, and off-season clothes.
By guest writer Jason Bacos
Learn More About Decluttering
Visit our guide to declutter your home.


Luchthavenvervoer Oostende
Monday 12th of April 2021
Great post!